We’ll walk you through the process of creating an OAuth Client ID and Secret Key using Google Console. Whether you’re building a web app, mobile app, or API integration, this step-by-step tutorial will help you set up your credentials in no time.
Watch the Tutorial Video
For a detailed walkthrough, check out my YouTube video where I demonstrate step-by-step How to Create an OAuth Client ID and Secret Key on Google Console:
Steps to Create an OAuth Client ID and Secret Key:
1.Go to the Google Cloud Console:
– Visit Google Cloud Console.
– Make sure you’re signed in with your Google account.
2. Create or Select a Project:
– Click on the project dropdown in the top-left corner.
– Select an existing project or create a new one by clicking New Project.
3. Enable APIs and Services:
– Click on left corner menu and Navigate to APIs & Services > Outh Consent Screen.
– Select user type: External, then fill app information.
– In autorize domain add your website domain.
– Then just click save and continue and finish it.
4. Create Credentials:
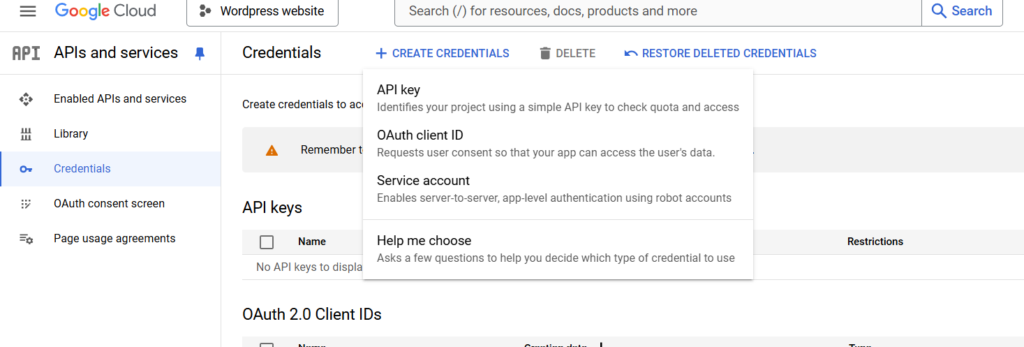
– Go to APIs & Services > Credentials.
– On top you see Create Credentials click on it and select OAuth client ID
– Choose the application type as Web application.
– Now add autorized redirect URL.

5. Save and Use Your Credentials:
– Once created, you’ll receive a Client ID and Secret Key.
– Save these securely, as they are essential for connecting your app to Google APIs.


